CBD 101 + Exactly How I Use It

Chances are, you’ve probably been hearing about CBD left, right, and center for a while now. Maybe you’ve even tried it out yourself, or maybe you still have questions. I started using it about a year ago to help reduce inflammation, support sleep, and manage pain from things like headaches and cramps. I’ve tried dozens of brands, and have always found myself coming back to one that really WORKS: Viva Oils.

I’ve had the opportunity to talk with the founders of the company on many occasions now to learn more about their sourcing, extraction methods, and quality controls, and can confidently recommend Viva as a brand that I trust!

Since there is still a lot of confusion out there about CBD, I thought I’d share an article written by a nurse, Romy, who is also one of the partners of Viva. After reading this article, if you want to try some for yourself, you can get 10% off your order with code wholedailylife!


At the end, I’ll share the specifics of exactly what I take and how I use it, so stay tuned for that!


What is CBD? 

Over the last few years, we have had more access to hemp derived CBD, as laws around the country have changed. There is now a CBD marketplace. With it comes so much choice! 

CBD stands for cannabidiol (pronounced can·na·bi·di·ol) – doesn’t exactly roll off the tongue, does it? But, what this wonderful phytocannabinoid is doing, is providing an alternative for people that are exhausted with the traditional medical approach to addressing health concerns. 

CBD is one of about 100 cannabinoids found in both hemp and marijuana (both subspecies of Cannabis). The more commonly known and better understood “illicit cousin” to CBD is the cannabinoid THC. Although close relatives, CBD and THC interact very differently with the body. The psychoactive effects that we all attribute to Cannabis, come from THC alone. CBD will not produce a psychoactive effect and it will not leave you feeling high. Although both CBD and THC hold beneficial properties, “CBD can be given at very high doses” because it has minimal to no side effects. Not the case for THC, which can cause adverse effects when taken in high amounts. 


Research shows that CBD holds many beneficial properties: 

✓ Analgesic (pain reliever)

✓ Anti-inflammatory (reduces inflammation)

✓ Neuroprotective (serves to protect nerve cells from damage or impairment)

✓ Anticonvulsant (acts to prevent or reduce convulsions)

✓ Antispasmodic (relieves spasm and involuntary muscle movements)

✓ Antiemetic (prevents nausea and vomiting) 


What is the difference between Full Spectrum and Isolate CBD? 

This is important information to know when deciding on a CBD product! 

Full Spectrum CBD It is widely held that full spectrum CBD products that contain the full mix of cannabinoids and terpenes offer the greatest benefit, compounding and enhancing the effects that any single compound can provide alone. Compare it to eating an orange – removing the Vitamin C and taking it as a supplement every day is great. However, eating the whole orange offers greater health benefit overall. Full spectrum CBD products contain trace THC (<0.3%) as per federal regulation. This is enough THC to provide benefit, without causing the user to feel high or impaired. 

Isolate CBD These products contain only CBD. All other cannabinoids and terpenes are removed. Isolate CBD products cannot produce the wide-ranging benefit that full spectrum products can provide. However, for some people this is a good option. 


Where does CBD come from? 

Both hemp and marijuana plants contain CBD. However, most of the CBD products available on the market are derived from hemp. Why? Hemp contains very low concentrations of THC and high concentrations of CBD (and other cannabinoids). 

The distinction between hemp and marijuana

Both hemp and marijuana are plant species that belong to the Cannabis genus. The main determinant as to which-is-which, is THC content (by dry weight volume). 

✓ Plants that contain greater than 0.3% THC = marijuana

✓ Plants with less than 0.3% THC = hemp 


What is the endocannabinoid system? 

Great question, many people are beginning to hear about how important this body system is... 

We all learned about the major body systems in biology class – the digestive system, nervous system, cardiovascular system... and the list goes on. However, there is another body system recognized by science. There’s a chance that you have not heard about it yet... It is called the endocannabinoid system. A mouthful, I know! Let’s call it the ECS for short 

The ECS is considered our homeostatic regulator and it “is one of the most important physiological systems involved in establishing and maintaining human health.”


The ECS has been understood and appreciated for less than thirty years. A small time period of scientific awareness. It is essentially a body wide cell signaling system. It promotes homeostasis – in other words, it works to brings balance to the body – and it has a profound effect on our ability to control pain, inflammation, sleep, mood, memory, reproduction and immune system control. The ECS is made up of three main components – receptors, endocannabinoids and the enzymes that form and break down the endocannabinoids. Here’s a quick description... 

Endocannabinoids: Our body produces compounds called endocannabinoids. Think of these as cannabis-like chemicals that relay signals to cells throughout the body – cells in our “brain, organs, connective tissue, glands, and immune cells”. Our body produces these chemical messengers on demand to respond to internal and environmental insults. This is anything that causes or has the potential to cause harm to our body. Examples? Internal insults could be inflammation, disease, stress or anxiety. Environmental insults describe threats to the body from the outside – such as trauma from injury or interaction with a bacterium, virus, fungi or any other contaminant that may be in our air, water and soil. Whether they are physical, chemical or biological, they could pose risk to our health... and our ECS is ready and waiting to respond. 

Cannabinoid Receptors: The cannabis-like chemical messengers (endocannabinoids) that we just learned about, interact with cannabinoid receptors found in cells throughout our body. The endocannabinoid fits into the receptor; as a key would to a lock. The message is delivered to the cell, and an action results. 

Enzymes: Lastly, there are enzymes that make-up and degrade our endocannabinoids. 

Now we know the components of the ECS – a system that works to achieve homeostasis through responding to anything that poses harm to the body, right down at the cellular level.

Scientists believe that many of us live with a clinical endocannabinoid deficiency (CED) – described as a loss of “endocannabinoid tone” and function. The ECS is not working optimally and a loss of balance results. CBD and other naturally occurring cannabinoids found in hemp, could provide the gentle nudge that we need. 


How does CBD interact with the body? 

Complete “balance” throughout our body – homeostasis within scientific circles – is unfortunately an unachievable expectation. A pot of gold at the end of the rainbow, so to speak. Every system within our body is relentlessly working to achieve this goal with the prize of optimal body function. Despite best efforts, many of us cannot get there. We could benefit from a little help. The many compounds within hemp could provide the answer. 

Research shows that CBD can help to support our endocannabinoid system and enhance our body’s signaling capabilities. 


An ECS operating at a sub-par level can result in body wide imbalance

✓ Lower pain threshold

✓ Persistent inflammation

✓ Digestive woes

✓ Mood imbalances

✓ Sleep abnormalities 

The question is, how can a sluggish ECS benefit from some gentle persuasion? This is where CBD comes in – it enters our bloodstream and once delivered to our cells, it encourages them toward more optimal function. Fact is, CBD does not directly interact with the cannabinoid receptors on the surface of our cell nucleus. Instead, it encourages the body to produce more naturally occurring endocannabinoids that, in turn, activate our receptors. 

Wait, there’s more? Using CBD offers a multi-pronged effect on the body. The enzymes that we spoke about earlier – they are responsible for making and breaking down our endocannabinoids – CBD can block their break-down action. The result? More cannabis-like endocannabinoids available to our cell receptors. Now that we have more endocannabinoids on board, they can get back to work activating our receptors. Isn’t that great? Come on body, you can do it! 


What is the best way to take CBD? 

The CBD marketplace offers so much choice! It can be confusing to know where to start. Tinctures, oils, salves, capsules, gummies, cookies, coffee, chocolate, water…

With the current nature of the CBD industry, there are many gimmicky products wrapped up with endless promises of success. It is possible to get pulled into a marketing ploy and be left believing that you can gummy your way to good health. This is simply not true! 

When you immediately swallow CBD products, the precious cannabinoids are sent to your liver, which acts as a filter, leaving very little CBD to circulate through your bloodstream and finally reach your cells – this is where they need to do their work. 

Instead, a method of administration should be found that bypasses the digestive system. Research shows that absorbing CBD sublingually, topically or through inhalation avoids first-pass metabolism by the liver. 

Sublingual: This is the most commonly reported method of CBD administration. The reason? It works. Research shows that close to 30% bioavailability is reached with this method. That is, the mucous membranes in our mouth allow for the CBD to absorb directly to our bloodstream. This bypasses the “first-pass” through the liver allowing for a higher concentration of CBD to be delivered to the cells in our body that need a little nudge towards better function. Still want to take your CBD in the form of gummies or capsules? With these methods, the amount to reach your bloodstream is closer to 6% (does not compare!). 

Tips for success with the sublingual method: 

✓ Choose a high-quality CBD oil – very important to success!

✓ Hold beneath your tongue for 60-90 seconds (the longer the better)! 

✓ Although CBD absorbs through the membranes in the mouth with the sublingual method, absorption does continue once swallowed. Research shows that taking CBD with food in your stomach helps to increase absorption. Increase your chances of success and take your CBD oil sublingually, immediately before or after a meal. 

Topical: Another way to sneak around our liver and ensure maximum absorption to the bloodstream is to apply your CBD topically. Direct absorption of CBD to target body locations is proving to be a game-changer for pain management. Research shows that this method can reduce inflammation by up to 50% post application. This is a significant finding! 

Tips for success with the topical method: 

✓ Choose a high-quality CBD oil or salve – this will make all the difference!

✓ Apply to areas of your body with pain or inflammation 2-4 times per day.

✓ Can be used to relieve dry itchy skin, sunburn, and bug bites. 

Inhalation: Inhaled CBD enters the lungs, passes though the bloodstream and quickly crosses the blood-brain barrier. Effects are felt quickly, usually within 3-10 minutes. Vaporizing CBD could be beneficial as an add-on option (used as needed) for those with an already established sublingual and topical CBD regimen. 

Tips for success with the inhalation method: 

✓ Choose a high-quality CBD Vape Oil – especially with the nonsense that is available on the market, be sure to do your research.

✓ Not intended as your primary source of CBD – use on an as-needed basis.

✓ Avoid products that contain harmful fillers such as propylene glycol (PG) and vegetable glycerin (VG).

✓ Avoid if you have asthma, COPD or live with any shortness-of-breath 


How do I know how much CBD to take? 

Very good question. There are very few clear guidelines and many people that are new to CBD are left confused... 

Besides the quality of the product and the method of administration, the next important key to the puzzle of finding success with CBD is – serving size! 

Important to note, CBD use should be a self-experiment to find YOUR perfect serving size for YOUR individual needs and YOUR unique metabolism. The key point – everybody has an endocannabinoid system (ECS) that holds a different level of function (or dysfunction, in most cases). So, there is no one-size-fits-all recommendation. 

However, research does give us the insight into where “therapeutic range” could be met with CBD – plus or minus, depending upon YOUR results. 

The amount of CBD that you need is directly proportional to individual body weight. 

For those with something greater than preventive health aspirations – with something specific that you are trying to address – this could be a guide for you to find “therapeutic range” ... 1mg CBD to every kilogram (kg) body weight (+ or -) depending upon results. 


Pounds (lbs) to kilograms (kg)? Use this conversion: Your weight in lbs / 2.2 = Your weight in kg 

Start low and go slow with CBD. This allows your body time to adjust to the introduction of CBD and it gives you the opportunity to find YOUR lowest possible serving size. Average starting serving sizes (for adults) is between 10mg-20mg CBD per day. On a weekly basis, increase your serving size by 10mg-20mg, until you have met your goals. 


How do I find a reliable & safe CBD product? 

Here’s a few things to look for... 

Consider extraction methods! The method that is used to extract the valuable cannabinoids and terpenes from the hemp plant determines the quality of the final product. The gold standard is CO2 extraction. Besides this, ethanol and other low-grade alcohols are used. Ask how your CBD product is extracted. Read labels. Very important information to know! 

CO2 Extraction: Carbon dioxide (CO2) is the same gas that we exhale after inhaling oxygen. It is the same gas that plants take in to allow for the production of plant energy growth. It is all around us. It is a natural gas that can exist in several different phases. Solid CO2 is dry ice. Liquid CO2 is achieved by manipulating the pressure and temperature of the gas and is often used to fill the chambers of fire extinguishers. Gaseous CO2 is what animals exhale. And supercritical CO2 is the phase that exists between a gas and a liquid – called supercritical CO2. This is what we use to remove the CBD hemp extract from the plant. A very gentle solvent that preserves every component within the final full spectrum CBD hemp extract. 

Ethanol Extraction: Over 80% of the CBD products on the market are extracted using this inferior method. Why? It is cheap and quick. Sad, but true! Unlike CO2, ethanol is a harsh solvent that strips the plant of many of the beneficial cannabinoids and terpenes. It also pulls out many undesirable plant materials (such as chlorophyll and plant waxes) that leave the oil green and bitter. To address the unpalatable taste, additional processing is needed. 

Study the ingredient list! Very often flavors and sugars are added to mask the unpalatable flavor of poorly extracted CBD products. Chocolate mint flavored CBD oil? Why? This should be an indicator to you that you are using an inferior product that has been extracted using ethanol (or acetone, butane or some other low-grade chemical). Remember, simple is always better. Adding sugars, flavors, preservatives and ingredients that are not immediately known to you should be a warning sign. Look elsewhere. 

Look for independent third-party testing Unfortunately, many products on the market are mislabeled and CBD concentrations are not guaranteed. The only way to ensure that you are purchasing a safe product with the concentration of CBD that you expect, is through access to independent third-party testing. This also gives you peace of mind that your CBD oil does not contain mold, fungus or harmful pesticides. If a CBD company does not advertise certificates of analysis (COA’s), please ask for them or look elsewhere. 


If you have more questions, Romy Campbell, RN, BSN is available at vivaoils.com (Nurse Romy Online Chat) to help! Don’t forget to use wholedailylife to save 10%!

Whew, that was a lot of information! I wanted this post to be a resource, so hopefully it will be something that you can come back to time and time again as a reference.


As promised, I also wanted to share which Viva products I personally use and how I use them.

My go-to is the 1000mg bottle, pictured above, and I generally take 1 full dropper (about 30mg) daily. If I have pain, a flare, anxiety, etc I will take another full dropper. I have also used the salve on sore muscles and the pet line almond butter with my dog Jak, but my go-to product is definitely the oil! The primary benefits that I see are a more calm and collected mindset, better sleep, and alleviation of pain from things like headaches and cramps!


*This post was sponsored by Viva Oils, but all opinions are my own.

NYC in 36 Hours: The Whole Daily Life GF Guide

I had never been to NYC before, so when Thorne offered me an opportunity to attend their Frontier Within event there at the end of June, of course I said YES! I flew out early on a Friday morning and left mid-day on Sunday, which left me with about a day and a half in the city.

Here’s the best of what I found, did, and ATE while I was there!

NYC in 36 Hours: The Whole Daily Life GF Guide

Friday:

After dropping my bags off at my hotel (I stayed here), I walked a few blocks to grab dinner at Hu Kitchen: I got the classic burger on GF/grain free sweet potato bun with side of sweet potato fries and a green juice. The burger and bun were delicious, but next time I’ll skip the fries and go with one of their other amazing looking veggie sides instead! I also picked up some chocolate and a slice of their carrot cake bar to go.

NYC in 36 Hours: The Whole Daily Life GF Guide

For dessert I stopped by Pressed Juicery to grab a Freeze. I used to have access to this whenever I wanted when I lived in CA, but now that I live in AZ, it’s a rare treat!

From there, it was back to the hotel for the evening to relax and prepare for the next day!

Saturday:

I took a Lyft up to NoGlu, but nothing grabbed my eye so I walked over to By The Way Bakery instead. I got to sample the brownie, which was incredible, and picked up a strawberry muffin to go. From there I walked through Central Park and over to West Village, where I got a cup of broth from Brodo. I ordered the Hearth broth, Tuscan Sun style, with egg yolk. It did not disappoint!

IMG_0774.JPG

From there I walked until I found a little spot to sit in a tiny little park, where I finished my broth and ate some of the muffin before heading on to the Thorne event.

That’s my heartbeat up there on the screen!

That’s my heartbeat up there on the screen!

After the event was over, I changed clothes and set out to walk down to Springbone to pick up some lunch to eat in Washington Square Park. I had a delicious salad with salmon, sweet potato, and an egg, and loved every bite! After that, I walked to GROM nearby to grab some gelato for dessert.

IMG_0851.JPG

I also wanted to make sure that I made it down to the 9/11 monument, which was incredibly humbling and beautiful. After that, it was down to the southern tip of Manhattan to see the Statue of Liberty in the distance from the Staten Island Ferry Dock!

NYC in 36 Hours: The Whole Daily Life GF Guide

I was pretty tired at that point, but ended up walking all the way back up to my hotel at 27th, but not without a couple of stops on the way! Two Hands was a cute little spot that was a perfect break on my walk. I also stopped at Erin Mckenna’s Gluten Free Bakery for a maple donut!!

NYC in 36 Hours: The Whole Daily Life GF Guide

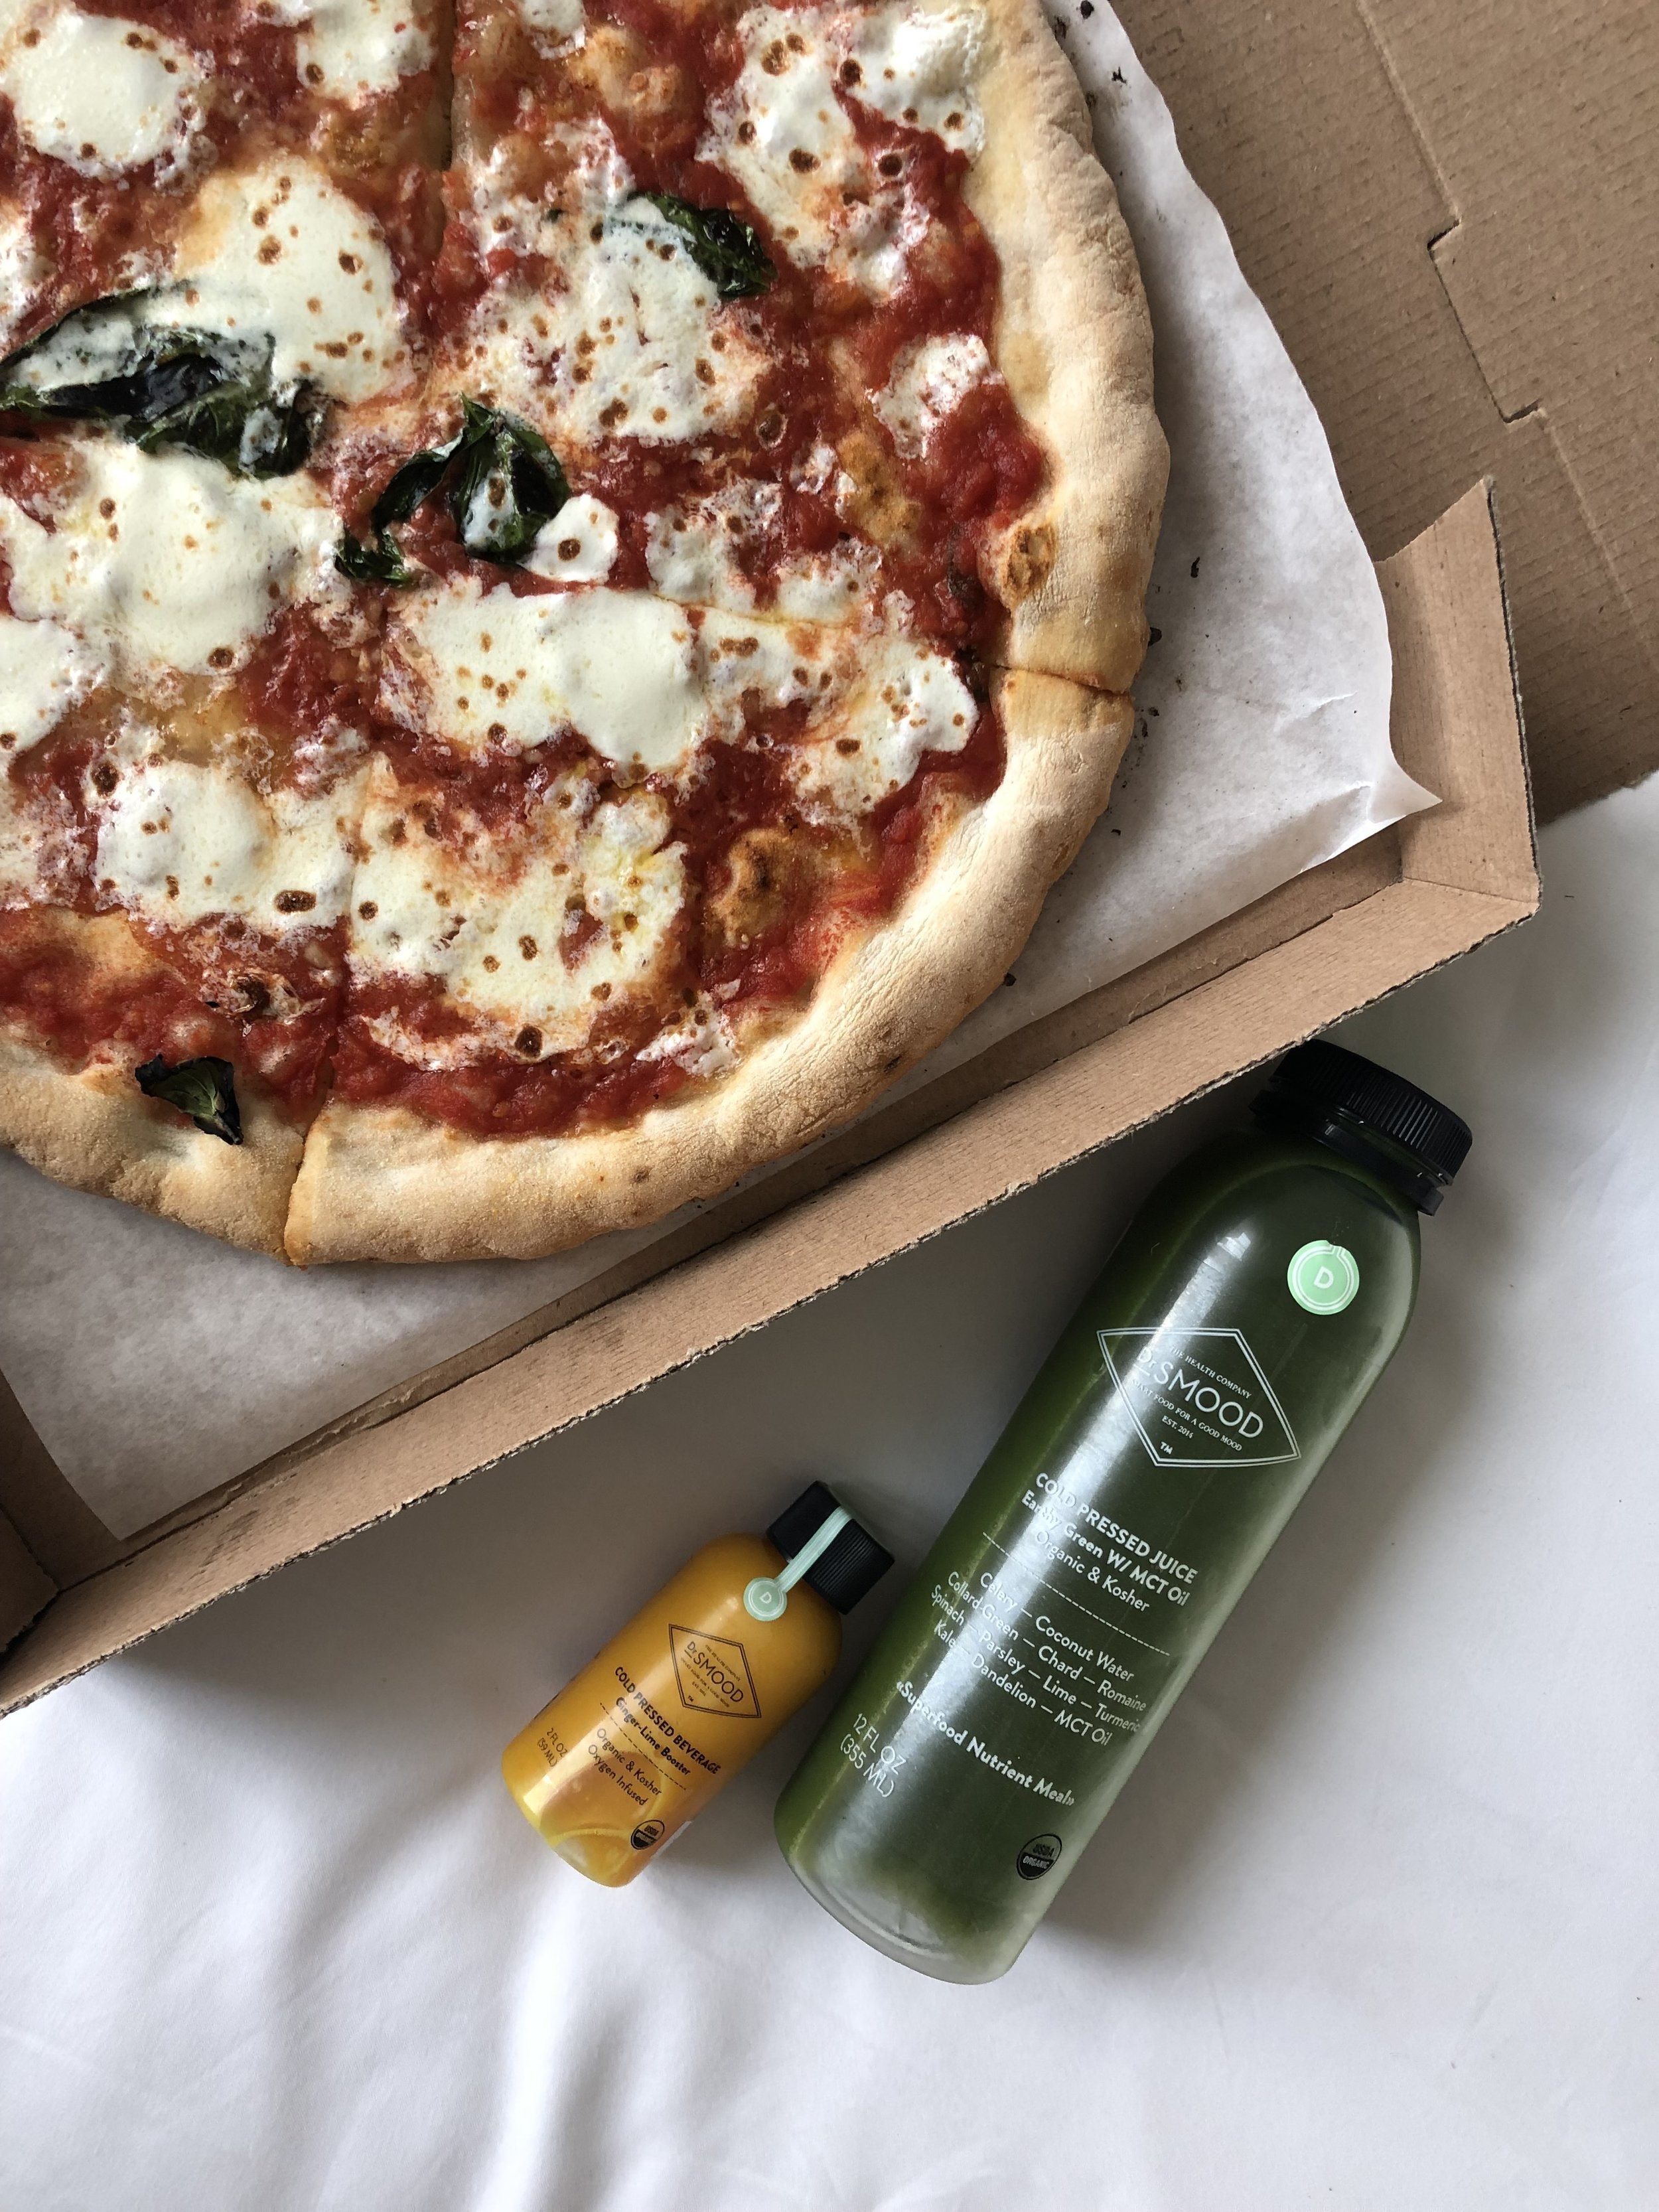
By the time I got back to my hotel I had walked 17 miles and was so exhausted I couldn’t even imagine going out for dinner, but I had planned to get pizza….because….NYC!! I decided to use Postmates (use code PZZNP for $100 in free delivery credit) to order from Keste. Their location on Bleeker has a completely separate and dedicated GF prep area and oven!! I got the classic margherita, and it really was worth it. The crust reminded me of my favorite pizza restaurant in Seattle…perfectly chewy and salty!! I also picked up a green juice from Dr. Smood to go with.

Sunday:

As it turned out, the Fancy Foods Show started on Sunday, so I registered at the last minute to attend! It didn’t open until 9:30, so I had breakfast at Bluestone Lane beforehand. I got the GF toast bar with avocado and smoked salmon, along with an almond milk matcha latte. All of it was delicious!! Next time I’ll get the half avocado toast/half granola option. Honestly, everything sounded amazing!

I only had a couple of hours at the Fancy Foods show, so I hardly got to even dip my toes in, and after that it was off to the airport to fly back home!

Here are a few other places that I wanted to try out but didn’t make it to:

  • ChaCha Matcha

  • Eataly

  • Little Beet

  • Sweetgreen

  • Clover Grocery

  • Cafe Clover

  • El Bucco (I hear the kale salad is outstanding!)

  • Hearth

  • Don Antonia’s (GF Pizza)

  • Noi Due Carne

  • Dig Inn

If you have any other gluten free recommendations for NYC, leave them in the comments! I’ll definitely be back again :)

Thanks!

-Tracey

The Best of Tuscany, Rome, and Positano: The Whole Daily Life GF Guide to Europe

I could easily get lost in reminiscing in a post like this, so I’m going to try and keep it practical and to the point!! My husband and I traveled abroad for 14 days, and I’m going to share where we went, how long we were there, the best of what we did, and anything else that I think is worth knowing! (Aka, the EATS.) This is part 2 of a 2 part series. Find part 1 with the details on Nice and Tellaro here!

MONTEPULCIANO, ITALY: 3 nights, 2.5 days

Travel:

We left Tellaro in the morning and drove a couple of hours to San Giminiano, which was just a little way off of the direct route to Montepulciano. We had stopped there on a bus tour when we were in Italy two years ago, and they have a world renowned gelato shop that we wanted to go back to! That was a nice stretch before the remaining two hours to get to Montepulciano. The drive was beautiful, full of picturesque Tuscan countryside views!

Accommodations:

We stayed at a bed and breakfast called Poggio Etrusco. Pamela Sheldon Johns, who wrote many of the Italian cookbooks for Williams Sonoma, runs it with her husband. We had a little apartment with a bedroom, kitchen, and living room. It was lovely there; almost all of the vegetation is a fruit or a vegetable, and we loved picking cherries off of the trees every time we walked by! There were a couple of other guests there as well, but for the most part, we had the place to ourselves.

Activities:

Cooking Class at Poggio Etrusco- This is one of the things that we were looking forward to the most on our trip! Pamela welcomed us into her home and put on a cooking class in her own kitchen, just for us. She was able to accommodate my gluten free needs as well without any issue at all.

Here was the menu: leaves and flowers battered in rice flour and fried in olive oil, chickpea spread on GF crackers, asparagus with two types of prosciutto, mushrooms stuffed with gorgonzola and walnuts, pinzimono (evoo + herb salt) with crudité, fresh fava beans, gnudi (ricotta spinach dumplings) with spicy tomato sauce, roasted chicken + potatoes, shredded vegetable salad, asparagus custard cups, GF chocolate cake with strawberry gelato. Are you drooling yet?? We spent about 3 hours together and got to help as we learned. After that, we all enjoyed lunch together out on their sunny patio, with a bottle of wine of course!

Lunch with a view after our cooking class at Poggio Etrusco.

Lunch with a view after our cooking class at Poggio Etrusco.

Pienza- It was a quick 15 minute drive to this nearby town. We didn’t spend long there, as it was pretty small, but there were lots of shops (especially for pecorino) to wander through!

Montepulciano- Since we were actually staying just outside of Montepulciano at the B&B, we wanted to make sure that we actually got to see the town! It was much bigger than Pienza, and the main street is a pretty steep incline all the way up to a plaza at the top. We had some reservations to keep elsewhere so we pretty much just hustled to the top and then walked back down. There were countless shops along the way though, and we could have spent much more time there. It’s also a wine tasting town, and many of the shops provide free tastings! You could easily taste your way through several glasses of free wine!

Winery Tour of Salcheto- Yet another highlight of our entire trip, Salcheto is an all organic, biodynamic, off the grid winery. They use only natural light, and use gravity to move the wine through the factory. Every choice they make is with the environment in mind. The tour was fascinating, and everything about the design and their production process was intentional and well thought out! After the tour, we got to do a tasting and have lunch at the restaurant there. (More on that below.) 

Salcheto winery

Salcheto winery

Farm Tour of Podere Il Casale- This was another highlight of the trip. Podere Il Casale is a self sustaining, biodynamic farm. The owners moved to Italy from Zurich 30 years ago and taught themselves how to farm because they wanted to produce quality food that they felt good about. The farm primarily produces goat and sheep cheese and has a herd of 60 goats and 300 sheep. We got to see the goat milking in action! We learned all about cheese production on the tour, then headed off to the restaurant for dinner. (More on that below.)

Goats at Podere Il Casale

Goats at Podere Il Casale

Eats:

-Gelateria Dondoli- This is the little gelato shop at the top of San Giminano that won best gelato in the world in 2016 and 2018 (I think). It really is excellent and worth a stop if you’re in the area!

-Tre Stelle- This little restaurant is actually part of a hotel, and is definitely a local favorite. It was completely packed by the time we left at 8pm! I had branzino and a side salad and C had pizza. We shared the pecorino appetizer with fruit and honey, which is a local dish. They also served us free limoncello after our meal!

-Ristorante Daria- Located in charming little Monticchiello, this restaurant is owned by Pamela’s best friend and came highly recommended! It did not disappoint. We asked for her recommendations and ended up with the local pici pasta (they had some that was GF for me, which was SUCH a treat!) I got the duck/sage version and C got the classic meat sauce. We also shared steak and veggies to share, which paired perfectly with the wine that they recommended.

Pici pasta, a local specialty, with sage and duck! They had a GF option for me!

Pici pasta, a local specialty, with sage and duck! They had a GF option for me!

 -Salcheto- We had a light lunch here, paired with our wine tasting. Everything that they serve is made from scratch, organic, and local. I had a green salad (from their own garden!) with a charcuterie plate, and C had salad with soup and beef carpaccio. They had no trouble accommodating my gluten free needs. You can stop in just for food as well!

Lunch and wine tasting at Salcheto. All organic and from their own gardens!

Lunch and wine tasting at Salcheto. All organic and from their own gardens!

-Podere Il Casale- After our tour of the farm, we stopped at the restaurant to eat. I do recommend reservations here, as they tend to book up. All of the produce and cheese that they serve is from their own farm! We shared the cheese plate (definitely recommend) along with the lamb and the veggie entree. Everything was incredibly flavorful and artistically plated. I did have a little bit of a harder time with my GF needs here (the menu wasn’t labeled, and there was a lot of checking with the chef), but it was worth it!

Cheese tasting at Podere Il Casale; all made in house!

Cheese tasting at Podere Il Casale; all made in house!

-GF Pasta shop- A tiny little shop that has frozen fresh handmade GF pasta, along with croissants/pastries and focaccia! I’m certain that the Pici I had at Daria was from here, and it was delicious. We picked up a couple of croissants and some focaccia to take with us. The foccacia was excellent, but I would skip the pastries in favor of the ones I found in Rome (below). Had we not been leaving town the next day, we definitely would have bought some pasta as well! I couldn’t even find the name online and didn’t catch it while we were there, but it’s right by this auto shop.

GF focaccia!

GF focaccia!

Other:

I definitely recommend having a car. It gave us the freedom to get out and about and see several other small towns while we were in the area!

ROME, ITALY: 1 night (stopover during travel) x 2

Travel:

This was a quick stopover for us, once on our way from Montepulciano to Salerno en route to Positano, and then again after leaving Positano before flying back to the states. On our way south, we still had the car so we drove from Montepulciano to Rome, stopping in Orvieto on the way for a cappuccino and to stretch our legs. We dropped off the rental car near Roma Termini, which was a bit confusing because the rental car return was actually at the top of a parking garage! Also, the garage was so tight and tiny that even our Fiat had trouble making the turns. As much as I appreciated having a car in the countryside, I was glad to be free of it in the city!

For our second night in Rome at the end of our trip we took a train from Salerno to the Roma Termini, then another local train out to the airport, where we caught a shuttle to the hotel where we were staying for the night.

Accommodations:

We stayed in this AirBNB (save 15% with this link if it’s your first booking), which was great! We didn’t have much time there, but would happily have been content for several days. On our way back through before our flight home we stayed at Hotel Academy, which we booked through Orbitz. It was definitely no-frills, but we weren’t even there 10 hours, so it hardly mattered. Had we thought about it, we probably would have just paid the entrance fee to the Delta lounge at the airport and stayed there overnight, because between the cost of the room and the shuttle both ways, the cost would have been the same and it would have been a lot less hassle!

Activities:

After we dropped off the car, we headed straight to our Air BNB, which was only a mile or so away, to drop off our bags. We only had a few hours, so we set out again asap to explore! We knew that we wanted to find GROM for some gelato, which was a pretty good walk across town. On our way, we stopped at the Trevi Fountain, the Pantheon, the Forum, and the Colosseum.

The Best of Tuscany, Rome, and Positano: The Whole Daily Life GF Guide to Europe

Eats:

This time around (as opposed to when we were in Rome 2 years ago), we did all no-cook and cook at home meals because we were there for such a short period of time. The first night, before we headed down to Positano, we picked up some simple veggies, sausages, tomatoes, cheese, and bread from the store. When we made our pass back through before heading home, we bought some no-cook groceries at the little Coop outside the Roma Termini before catching the local train out to the airport and our hotel.

La Pasticciera- An entirely GF bakery right by the Roma Termini! We stopped by before we caught our train to Positano, and it was by far the best GF baked good I had all trip!

GF Nutella croissant from La Pasticciera in Rome

GF Nutella croissant from La Pasticciera in Rome

GROM- Of course :) Not only did we go when we spent our first night there, but we also managed to snag one last scoop at the train station on our way out of town to the airport!

The Best of Tuscany, Rome, and Positano: The Whole Daily Life GF Guide to Europe

Other:

Rome is one of my favorite cities in Italy. There is so much to see and do! One of these days I’ll try to put together a post of our favorites from when we spent a few days there two years ago!

POSITANO, ITALY: 3 nights, 2 days

Travel:

Getting to Positano was the only travel difficulty we had on our entire trip. We took a train from Rome to Salerno, then had bought tickets to take the ferry down to Positano from there. However, when we got to the ferry dock we found a sign that said that all ferries had been cancelled due to weather…surprise! Well, we didn’t have internet or a backup plan, so we did our best to ask people about the busses and ended up at a bus stop with about 75 other people who were stuck in the same situation. Many of them had been waiting for hours, since all of the busses were packed due to the ferries being down. We waited for about 45 minutes and got lucky to get on one to Amalfi, where we waiting for another hour to catch a second bus to Positano. We were fortunate to make friends with a local who was also going that way, and who was able to give us rough directions to our Air BNB and let us know which bus stop to get off at. The first leg was about 75 minutes, and we were standing the whole time. The second leg was an hour, but at least we got seats! The busses drove along the edge of the cliff the whole way, often coming within inches of other cars, busses, or rock walls. I wouldn’t want that job, that’s for sure!

Accommodations:

We stayed at this Air BNB (save 15% with this link if it’s your first booking). It was sufficient, but not outstanding. We did enjoy all of the space, and especially the patio! One of the things that caught us off guard was the fact that they charged 40E if you didn’t take out your own trash (not hard to do, but you had to pay attention to know that was your responsibility) and they also charged for electricity, which we didn’t find out until the time of checkout.

Activities:

We spent most of our time in Positano just out walking and hiking! There are TONS of stairs, so be prepared. On our first day we hiked down to the water a couple of times and took the road up and around town as well. We stumbled across a little citrus shop called Valenti where we did a limoncello tasting. The woman who owned the shop also let us taste various spreads, jams, candies, and even took us across the street to her garden! That was a fun experience.

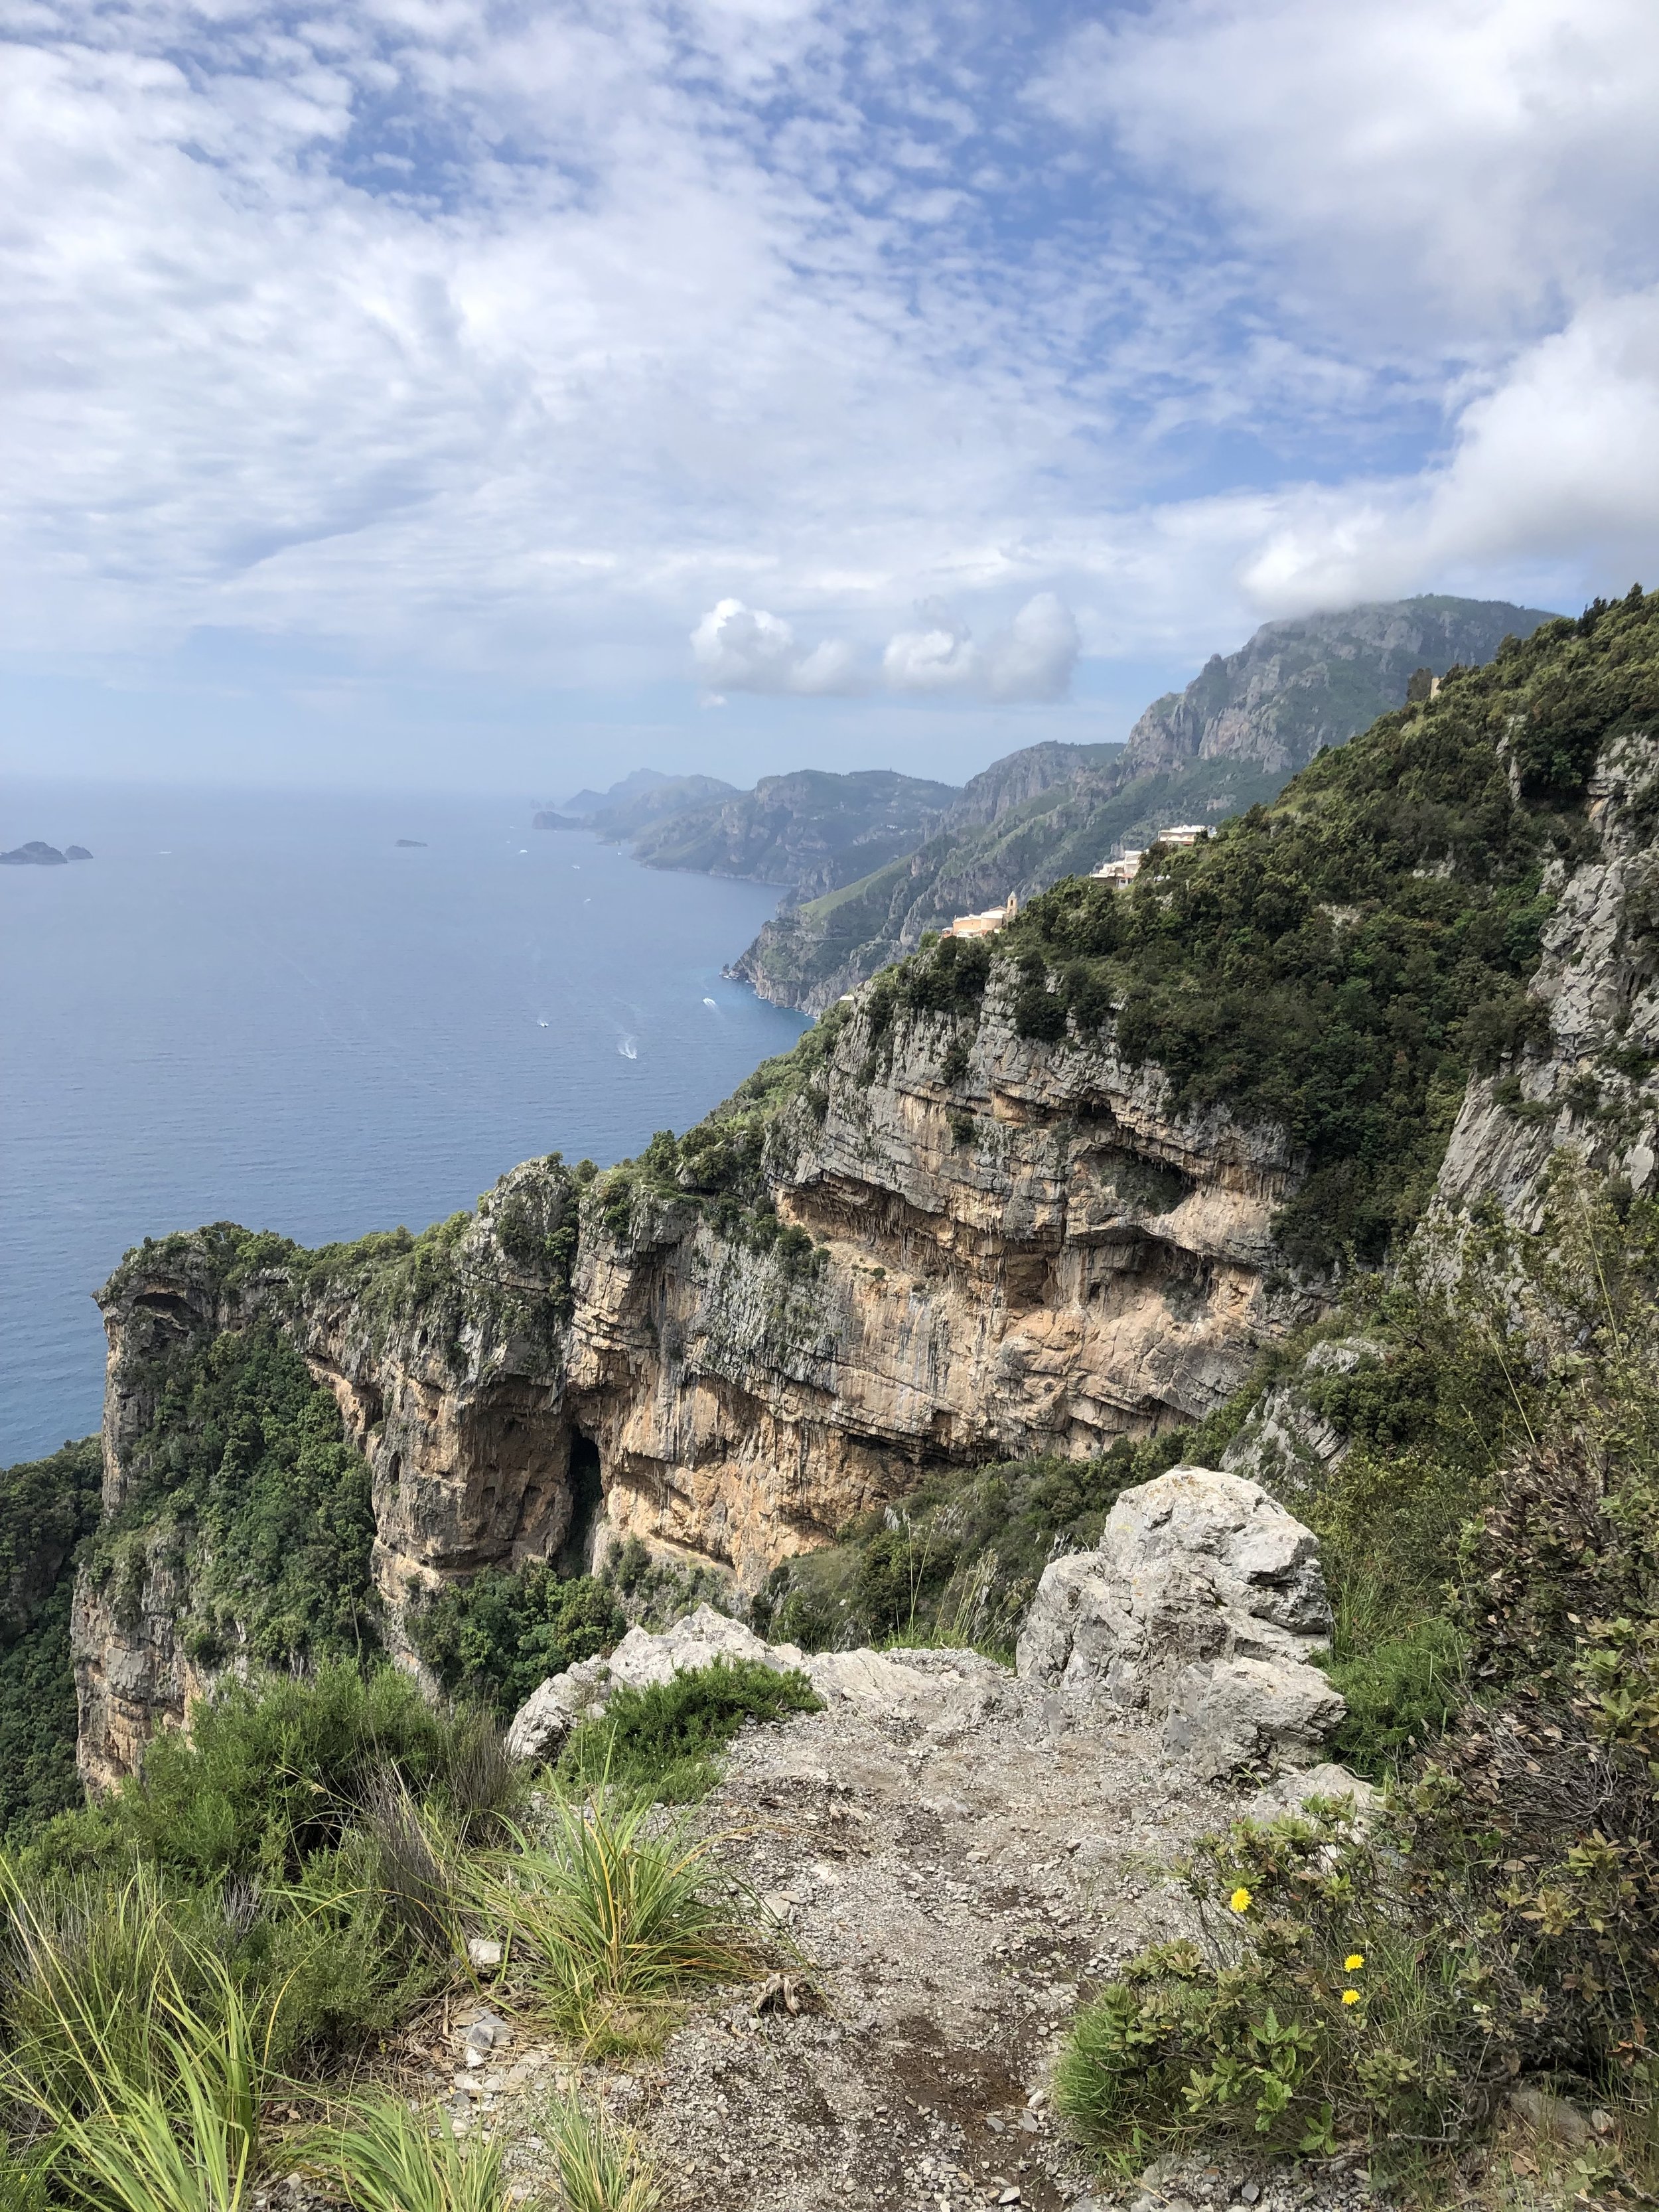
On our second day we hiked part of The Path of The Gods. We knew that we could take a bus to the start of the path, but given our experience with the busses on the way there, we decided to hike our way there instead. Starting in Positano, this meant hiking out of town a bit to the base of a huge staircase (1500 steps), which took us to the START of the path. We refilled on water and then set out again. The path itself was a pretty easy/moderate hike with incredible views! It was about 4 miles one way, so since we hiked TO the path in addition to the path itself, we decided to just go half way before turning back. I think that was a good choice, because by the time we got back to the bottom where we started, our legs were toast and we were hungry!

View from The Path of The Gods

View from The Path of The Gods

Eats:

-Da Vincenzo- This was another one of our favorite restaurants of the trip, and we ate there two of the three nights that we were in Positano! It’s a Michelin Star restaurant, and for good reason. They fill up quickly, so since we didn’t have reservations, we showed up before they opened and were fortunate to get a seat both times. We had the buffalo mozzarella both nights (a local specialty), and the yellowfin with zucchini alla scapece was my favorite dish! We also tried a pear and hazelnut ricotta torte, which I highly recommend!

Yellowfin and Zucchini alla Scapece at Da Vincenzo

Yellowfin and Zucchini alla Scapece at Da Vincenzo

-La Latteria- A little market where we bought eggs, fruit and veggies, prosciutto, etc for our breakfasts and charcuterie lunches. They also have lots of prepared dishes in the back at the deli counter. We had the octopus salad, which was delicious! Utilizing this market was one way that we saved some money here, because eating out was expensive!

Charcuterie spread for lunch in Positano

Charcuterie spread for lunch in Positano

-Saraceno de Oro- We ate here on our first night. They were happy to accommodate my gluten free needs, but didn’t mention up front that each item that I ordered would have an additional 2E up-charge, even if no modifications were needed. C did get an amazing pizza there, and it is one of the more affordable places to eat in the area.

-Cafe Positano- One of the things that I wanted to do while in Positano was have an espresso with a view of the coast. Cafe Positano has one of the best views that we found! We only had the espresso here (much of the food looked like it catered to tourists, which we don’t prefer), and we paid top dollar for the view, but it was worth it!

The Best of Tuscany, Rome, and Positano: The Whole Daily Life GF Guide to Europe

Other:

I definitely recommend utilizing the ferry to get to and from Positano! When the weather was agreeable, it was significantly faster, easier, and more enjoyable than the bus.

As expected, Positano was the most expensive destination of our trip. I’m glad that we went, because it was beautiful, but if we return to this area, I think we will look for a small town in the area and stay there instead.

For more on our budget and how we managed money while abroad, head back to part 1, HERE. For more on how I managed my Hashimoto’s while on this trip, see THIS POST, and for more on the supplements that I took and how I organized them, head on over HERE!

I hope this guide has been helpful! Feel free to leave any questions or comments below and I’ll get back to you!

-Tracey

The Best of Nice and Tellaro: The Whole Daily Life GF Guide to Europe

I could easily get lost in reminiscing in a post like this, so I’m going to try and keep it practical and to the point!! My husband and I traveled abroad for 14 days, and I’m going to share where we went, how long we were there, the best of what we did, and anything else that I think is worth knowing! (Aka, the gluten free EATS.) This is part 1 of a 2 part series. The details on Tuscany, Rome, and Positano can be found here!

NICE, FRANCE: 3 nights, 2.5 days

Travel:

We flew from PHX > SLC > JFK > NICE. We left PHX at 6am on a Friday and arrived in Nice at 10:30am on Saturday. Both layovers were pretty short, and we packed snacks (Wild Zora bars were my go-to, and I also packed one of their meals) for the trip, though food was provided on the international flight. (If you’re strictly GF like me, be sure to let the airline know in advance! One perk to having a special diet is that they serve you your food first, though you don’t get a choice like everyone else.) We did try to sleep on the flight from JFK to NICE, but neither of us are good plane sleepers. I did find that the TRTL wrap helped quite a bit though! When we landed in Nice, we took a local bus to get to our AirBNB. Tickets were less than 10E apiece and we bought them at the airport and caught the bus from there.

Accommodations:

We stayed at this AirBNB (save 15% with this link if it’s your first booking) and LOVED it. It was probably our favorite place of the whole trip! The view was incredible, and we spent as much time as possible out on the balcony to enjoy it. It was in a great location too; easy to reach from the airport, and perfectly walkable to the beach, old town, and anything that we wanted to do.

View from our Air BNB in Nice.

View from our Air BNB in Nice.

Activities:

The day we arrived we just settled in, took a nap, and then ventured out for dinner. On our first full day we walked along the beach and then hiked Castle Hill (great views of the city!), wandered through a Sunday farmer’s market in Old Town (we loved just getting lost in all of the winding streets and exploring the shops!), and went out to dinner.

The view from Castle Hill.

The view from Castle Hill.

On our second full day we took a day trip to the neighboring town of Eze, which I highly recommend! We caught a local train to get there and got off at Eze station, just a few stops down the coast. After we wandered down to the water (don’t miss that crystal clear blue!) we hiked through the neighborhood for an hour or so before realizing that the Eze that we had seen in photos wasn’t there. We made it back to the tourist office JUST in time to catch the once-an-hour bus that drove up to Eze Village, significantly further up the mountain than we would have been able to walk. We bought tickets on the bus for 1.50E each (I think). The drive was winding and beautiful, and when we arrived half an hour later, we grabbed a quick snack from the grocery store by the bus stop and then headed up into the stone streets to explore. There were tiny little shops around every corner! At the very top was the Botanic Garden, which cost 6E each to enter. We decided to go for it, and I’m glad we did, because the views were unbeatable! We stopped in a few shops on our way back down before catching the bus back down.

We also considered going to St. Jean, but our Eze adventure took longer than we thought, so we decided just to head back to Nice at that point.

View from the Eze Botanic Garden.

View from the Eze Botanic Garden.

Eats:

-GiGi Tavola Autentica: Probably the best GF pizza I’ve ever had, with a dedicated preparation space! We went two days in a row, and also enjoyed the vegetable platter and the salads. Located over by the port, it was a bit of a walk from our place, but worth it. One of our favorite restaurants of the trip.

Pizza from Gigi Tavola.

Pizza from Gigi Tavola.

-GROM gelato: Still my favorite gelato shop! Located right along the main road through town, not far from the beach. Everything here is gluten free, including the cones.

-Naturalia market: The equivalent of a Natural Grocers or local health food store here in the states. We picked up some no-cook eats for our travel day from here!

-Lou Pilha Leva: Socca, or chickpea flatbread, is a thing in Nice. You can get it pretty much anywhere, and it is naturally gluten free. We got some from Lou Pilha Leva on a chilly, rainy evening and ate it piping hot and drenched in olive oil and salt. It was delicious!! It’s a casual spot, so don’t expect anything fancy, but it gave us the experience we were looking for! We didn’t try anything else on the menu though.

Other:

-The local grocery store is Monoprix, and we stopped in several times, mostly for snacks/no-cook eats. We did pick up some GF bread, butter, eggs, and fruit on our first day and cooked breakfast at home every morning.

-Galettes, or savory crepes, are made with buckwheat and are traditionally gluten free. However, they are not always cooked on a dedicated surface. We did have them once without issue. More on how I approached gluten free eating in this post***.

TELLARO, ITALY: 2 nights, 1.5 days

Travel:

Since Tellaro is a tiny little town, it would have taken us a full day to get there using public transportation, so we decided to rent a car instead. However, renting a car in France and leaving it in Italy was much more expensive than keeping it within one country, so we took a 3 hour train from Nice to Genoa, then walked from the Genoa train station to the ferry terminal to pick up our rental car from Hertz. The rental (a Fiat 500L automatic) was around $350, so not cheap, but it was worth it for all the time we would save on several legs of our trip. We came prepared with printed maps and instructions, but trying to deal with traffic and get out of the city without an active GPS was nerve wracking, so we quickly agreed to pay the 10E charge by Verizon to activate international cell service for 24 hours. (It’s a day by day service called the Travel Pass and it worked great! We used it 3 times, each day we drove). Things went much more smoothly after that!

Accommodations:

We stayed at this Air BNB (save 15% with this link if it’s your first booking) and loved it!! It was 4 levels, and you could open the window on the top floor where the bedroom was and listen to the waves at night. Our favorite part was the balcony, which was 10 feet from the water’s edge. There was no internet here, which was both nice and inconvenient at times.

The Best of Nice and Tellaro: The Whole Daily Life GF Guide to Europe

Activities:

Because it was so small, Tellaro was a pretty relaxing destination. The day we drove in we stopped for a picnic lunch (we brought some proscuitto, cheese, cherries, carrots, nuts, etc from the grocery store) overlooking a neighboring town, Lerici, before meeting our Air BNB host. After we got settled in at our place, we set out to explore and quickly discovered that you can walk all of Tellaro in about 15 minutes! As such, we spent plenty of time enjoying the view from our balcony.

On our one full day in Tellaro, we decided to get out and walk along the coast over to the neighboring town of Lerici. The walk took us about 45 minutes on the road. There were no sidewalks, but plenty of others on foot, and cars were easy to hear coming. When we got to Lerici we explored the port and then walked over to the next town, San Terenzo, where we bought a carton of strawberries and sat by the water to have them as a snack! We wandered the winding streets and shops for a little big before heading back to Tellaro, which was a pretty good hike to get back up to the road, but didn’t take us long.

The Best of Nice and Tellaro: The Whole Daily Life GF Guide to Europe

Eats:

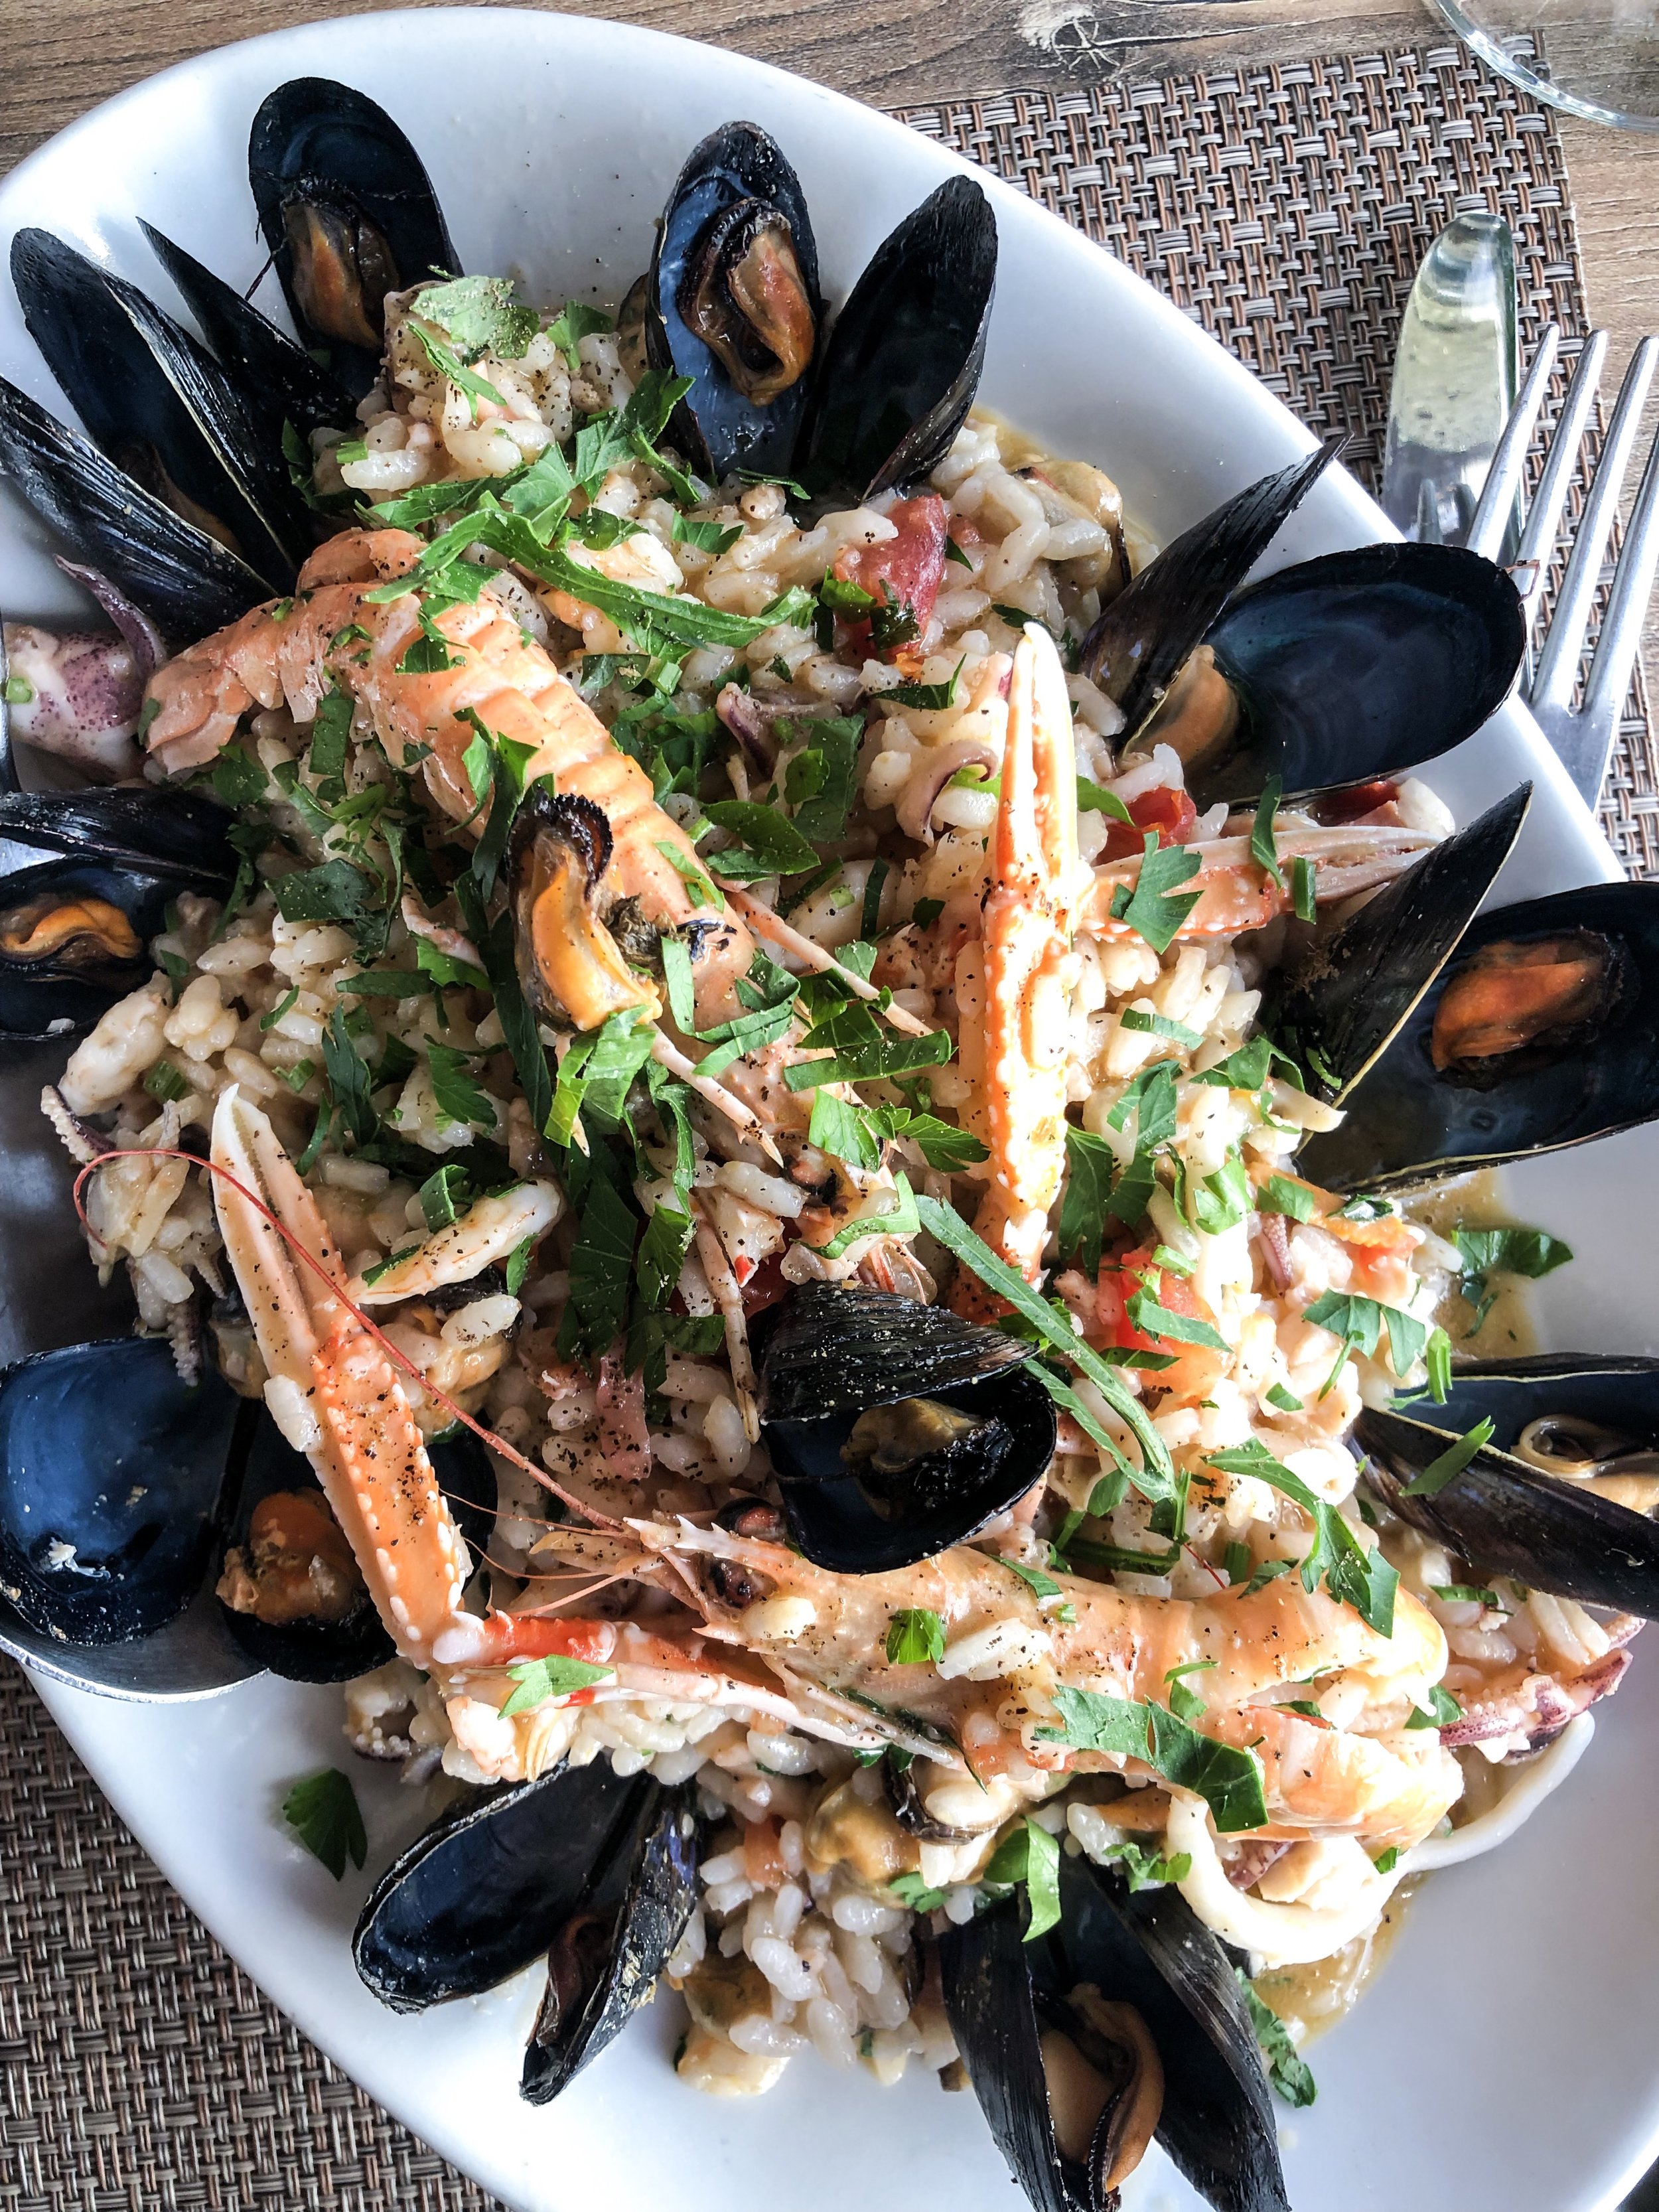
-Osteria La Caletta: One of the best meals of our entire trip! We would have eaten here both nights if we could have, but they were closed on the first one. We started with the steamed salmon appetizer and the roasted veggies, and then shared the seafood paella. My mouth is watering just thinking about it! We also shared a carafe of the house white wine. They brought out bread for both of us (GF for me) and also a complimentary fried socca appetizer. 10/10 recommend. Our entire meal (which I would give 5 stars) was only 60E!! If we could go back, we would do the tasting menu for sure.

Seafood paella at Osteria La Caletta.

Seafood paella at Osteria La Caletta.

-La Barca: This place was just a magical experience. We got there for lunch around 1:30 (they close at 2), and were the only ones in the entire restaurant. We had a table upstairs by the windows with a beautiful view of the water. I ordered the octopus with pesto mashed potatoes and beets and Craig got the gnocchi with veggies and langostino. This is also the only spot in town with internet! After having eaten there, we were able to sit at the cafe next door and use the wifi on subsequent days as well.

The Best of Nice and Tellaro: The Whole Daily Life GF Guide to Europe

-Bar Underground: This is the little cafe, coffee shop, and bar in town. We went every day for cappuccinos (1.50E each). It’s a nice little spot to sit and read, or to use the wifi from next door!

Cappuccinos from Bar Underground.

Cappuccinos from Bar Underground.

Other:

The restaurants don’t open for dinner until 7 or 8pm, so if you like to eat early (like we do), be sure to have some snacks on hand! Pretty much everything closes mid-day. We ate one meal at El Delfino, but it was just okay. If you can go to one of the two listed above instead, I highly recommend that instead. There isn’t a grocery store in Tellaro, but there are a couple of little food shops, one up above the square (the main part of town) and one down below. As usual, we picked up some eggs, veggies, and yogurt to have for breakfasts.


A few other random thoughts:

Budget:

No doubt about it, this trip was the stuff of dreams. There were times where I almost felt guilty for enjoying it so much and for all of the things that we got to do while we were abroad. However, I reminded myself that we saved diligently for two years for this trip, and it encompassed two anniversaries, two birthdays, and two annual vacations! We bought our flights with credit card points. Our biggest expenses were accommodations, followed by food and drink. Travel and lodging were all paid for up front, so while we were there, we aimed for a budget of around 100-150 euro per day for food and activities. Some days we spent way less (like in Tellaro, where everything was really affordable) and some days we spent on the higher end (like in Positano, where prices were almost double). We weren’t frivolous, but we also didn’t decide not to do something that we really wanted to do because of cost. Some of the ways we kept total expenses down were by making coffee and breakfast at home in the mornings and having simple food (no-cook or similar) for one meal most days. At the end of our trip, we were within a few hundred dollars of our goal budget!

Money:

-We used both cash and card on this trip. In the hustle leading up to leaving, we forgot to pull cash out of the bank, so the night before we left we gathered up all the cash we had on hand at home ($170) and took it with us. We exchanged it at the airport, which was a flat $10 fee, and got around 150E for it. We pretty much broke even here compared to if we had exchanged it abroad or pulled out cash from an ATM when we landed, but if we were going to do more, the airport would have been the better option, because the international ATMs charge a percentage in addition to the flat rate.

-We knew that our AMEX didn’t have an international transaction fee, so we planned on using that card for most of our purchases, but forgot that many establishments in Europe don’t accept AMEX. This meant that we were stuck using our Cash Rewards Visa, which did charge a 3% international transaction fee. We always tried the AMEX first, and paid for small things in cash (we did pull out cash from an ATM one other time), but ended up with about $50 in fees at the end of the trip from the Visa. Live and learn! If you bank with BOA, there is a Travel Rewards card that does not have an international fee that you can use as well.

For more on how I managed my Hashimoto’s while on this trip, see THIS POST, and for more on the supplements that I took and how I organized them, head on over HERE!

I hope this guide has been helpful! Feel free to leave any questions or comments below and I’ll get back to you!

-Tracey

How I Stayed 100% Gluten Free While Traveling in Italy and France

I have often heard that the wheat in Europe is different than what is available in the states, and that many who have a gluten sensitivity at home are able to tolerate gluten without issue abroad. While I don’t doubt that there is a difference (Europe doesn’t currently allow GMO’s and has much more strict food standards than we do), I personally chose not to risk eating gluten abroad, just in case I still had symptoms like I do at home. I’d hate to miss out on feeling my best for a couple days of vacation!


Fortunately, these days there are infinitely more options for gluten free food than even just a few years ago, but dealing with a language barrier did make things slightly more difficult. Even so, I found both France and Italy to be extremely GF friendly and completely accommodating!


Here are some of the things I kept in mind while eating 100% gluten free while abroad.

How I Stayed 100% Gluten Free While Traveling in Italy and France | Whole Daily Life


Do some research ahead of time.

While it is pretty much always possible to get simple meat and produce that would be safe to eat, I also wanted to enjoy the local cuisine! I knew that I wanted to have some GF pizza, pasta, and pastry if possible. I made sure to do some research ahead of time using Google Maps, Yelp, and Find Me Gluten Free to see if there were places that looked worth seeking out. It was also easier to do research in advance than when I was hungry and ready to eat! I went with a few ideas for each location that we traveled to, which gave me a good foundation for where we might want to eat.

Know the high risk dishes.

A meal of pan seared fish and sautéed vegetables is a much “safer” option than a GF pizza or pasta dish, as there is much less risk of cross contamination. (Pizza is often cooked in a shared oven, and pasta sometimes in a pot that hasn’t been thoroughly washed!) It’s hard to ask about shared surfaces and utensils in a foreign language, so if I wasn’t sure about the restaurant or they didn’t seem to have a good awareness of gluten and cross contamination, I usually stuck to meals that were less likely to be problematic. (I will say that I was less concerned about cross contamination abroad in general, primarily for the fact that many who have non-celiac gluten sensitivity do okay with wheat abroad. I did do my due diligence to avoid it, but didn’t ask as many questions as I might at home.)

Consider gluten digesting enzymes.

This isn’t something that I routinely use at home, but I did take them with me abroad. I have used this brand and this brand. In short, these enzymes are specifically formulated to digest gluten quickly, before it can trigger a response. They aren’t meant to handle a full gluten containing meal, moreso for accidental cross contamination. I used these when I ate meals that had a higher risk of cross contamination, such as GF pizza or pasta.

Have a backup form of communication.

I carried a gluten free card in both French and Italian. These are just written explanations in the local language of what gluten free means. They go a step further to describe cross contamination and possible sources of hidden gluten. I didn’t need to use these at all, but it was nice to have as a backup, in case we ended up in a situation where there was a complete language barrier and we didn’t have any other options. I had a screenshot of each on my phone. I also knew how to say “gluten free” in both French (sans gluten) and Italian (senza glutine), and was familiar with what the gluten free symbol looked like on packaging.

Let your server know up front.

I made sure to communicate from the beginning that I needed gluten free food and asked if there was a gluten free menu (if items weren’t marked). If there wasn’t a separate menu, I asked what dishes were gluten free and the server was always able to walk me through what I could and couldn’t have. I also reminded them when actually placing my order.

Trust your instincts.

This goes without saying, but if something didn’t seem right, or there was something on my plate that I wasn’t expecting or couldn’t identify, I waited to confirm what it was before eating. Same thing went for the bread that was served to me at a meal. Most of the time it was packaged and clearly labeled, but if not, I made sure to double check!


Living a 100% gluten free life is one of the ways that I manage my Hashimoto’s naturally. You can find some of my other top recommendations for that in my free PDF download!

I hope these tips are helpful! If you have any others that you would add, please share them in the comments!


Until next time,

Tracey